This 2020 Ppt replaces the earlier post:
...
You will need a gmail account to complete this.
Your task is simple: carefully following the instructions below, set up a new blog and start adding to it with the tasks at the bottom of this post!
ONCE YOU HAVE WORKED THROUGH THE 10 STEPS BELOW, CHECK YOU'VE SET (1) 'WORD VERIFICATION FOR COMMENTS' TO NO; (2) 'COMMENT MODERATION' TO ALWAYS (YOU NEED TO PROVIDE AN EMAIL ADDRESS) [both of these through DESIGN-SETTINGS-COMMENTS]; (3) TIME TO GMT [through DESIGN-SETTINGS-FORMATTING];
Read the following carefully; take the time to think of a brief and memorable URL:
PREVIEWS OF THE BLOGGER SCREENS:
2: Click on Create New Blog
3: For name, think of yourselves as a film company and come up with a SHORT, catchy company name.
 |
| The URL is the website address (top); you don't add spaces, but do keep it short - you could abbreviate your blog name to get a shorter address, eg prods instead of productions. The Blog name is the blog title, seen at the top of each blog page; you can add a gadget which carries an explanation/description of the blog once you've set it up. |
4: For address, type in a brief but relevant URL (remember, this will appear on promotional materials; it must also be appropriate for a student). You might have noticed I try to make my blog addresses easy to remember: '
musividz' instead of, say, '
musicvideoa2mediastudiesatschoolname'!
5: TEMPLATE/LAYOUT: Start with one of the 'SIMPLE' templates - but not the black colour background, which
always causes problems (see
here).
Add a background image if you wish (you can change this at any time).


Click on the column layout shown in the screenshot above.
 |
| Once your blog is set up and you're on your 'dashboard' you'll see your blog name and can directly create a new post (pencil), access the full left menu you can see below (arrow) or just open the blog. |
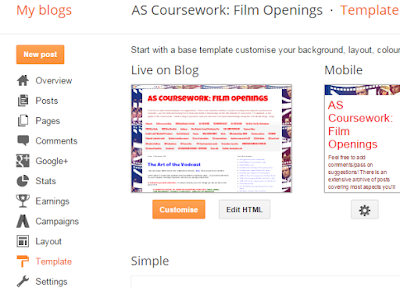 |
| Once your blog is set up you can make changes at any time through your dashboard. Click on the blog name (or select one of the options you can see on the left by clicking the arrow and choosing from the dropdown menu) to see the options on the left. If I want to adjust widths, fonts, the background image (etc), I'll click on Template, then Customise. |
 |
| Settings for point 5. Makes your blog neat + easy to navigate. |
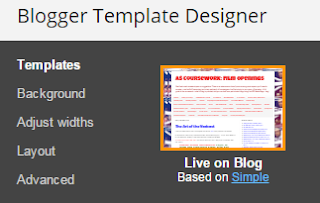 |
| The options you get through Template-Customise |
6: ADJUST WIDTHS: 1000/340 You need to ensure you make your blog wide enough to avoid problems with embedded video clips and Scribd docs (but not so wide readers on small screens have to keep scrolling left-right). In DESIGN-LAYOUT-TEMPLATE DESIGNER you can 'ADJUST WIDTHS' to 1000 and 340px - see the screenshots above [ask if unsure!]

7: Change links appearance to the traditional dark blue - the blogger templates annoyingly set this to dull colours. See screenshot below.
 |
| Go through Template-Customise-Advanced-Links to change to these defaults |
8: Once its set up, please email me straight away with the URL of your blog - take this from the browser, NOT your blogger homepage
 |
| The URL is the webpage address. Remember: the shorter the better! |
9: Once you've done this you can create a new post and blog on the A2 brief (you can find it every time you look at this blog... look at the top links list or blog description); copy/paste the precise wording I've used. Post title: The A2 brief!
10: If you haven't already, add yourself as a follower of the 'MusiVidz' blog and other blogs relevant to your A2 study (use the links here). Later on you will follow your coursework partner/s blogs too.
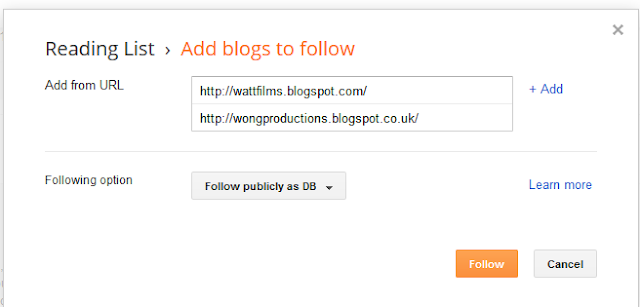 |
| You can add multiple blogs to follow. When you have you can quickly browse through the posts on these blogs by clicking the blog name on your reading list (the blogs on the left in the shot below; this is what you will see in the bottom half of your screen each time you log in to blogger). You will also see the most recent posts, a useful way of keeping up with what I'm blogging on, as well as your coursework partner/s too. |
You can start blogging any thoughts/research/useful examples as of now!!! Remember, you're trying to evidence the process that underpinned your eventual productions.
ONCE YOU HAVE WORKED THROUGH THE 10 STEPS ABOVE, CHECK:
(A) YOU'VE SET 'WORD VERIFICATION FOR COMMENTS' TO NO + 'COMMENT MODERATION' TO ALWAYS (YOU NEED TO PROVIDE AN EMAIL ADDRESS)
 |
| Your comment settings should look something like this |
 |
| If you get spam comments just click 'mark as spam'; if its from me, note what I've written and publish once you've acted on this. You can check on comments at any time in your dashboard. |
(B) TIME TO GMT (select YOUR timezone) (and, yes, i do know I've repeated this!)


 Click on the column layout shown in the screenshot above.


No comments:
Post a Comment